As mentioned in my previous introduction of the Sony CDP-X7 ESD, I had suspected the CD mechanism & laser head was at the end of it's long 29 years service life since new! The symptoms were there, the long disc loading times, some disc unable to detect TOC, or some disc won't either play at the first or last track, and most of all, if I had to skip or reverse a track, it will take a long time to cue, then play. I was looking around for a replacement KSS-190A CD mechanism if I could. I didn't just want to replace the BU-1D laser head only. Yeah...... you can say I like my spare tire!
Found a brand new NOS unit in eBay, to be shipped from Germany, but they wanted some thing like close to 700 Euros and shipping cost have not been factored in yet! I had to turn to my next most trusty source, my sourcing buddy in China. If it's made or available in China, this guy will find it!
And found me a whole KSS-190A unit he did! Bless him..... It's a refurbish unit, come with a test video of the mechanism sent via Wechat too! 2 weeks after that, I got my package from the courier and my replacement project can commence.
Here is a step by step pictorial guide with caption to help someone if any one wants to embark on a similar exercise.
 |
| As mentioned, the Sony is very well built, and like the Marantz CD7 I rescued from the past, one needs to remove the top & bottom cover to access the CD mechanism, and everything inside! The CD mechanism is best accessed from the bottom but some action needs to be approached from the top too! Here you see the Sony up side down, awaiting surgery! |
 |
| Before the KSS-190A mechanism can be removed, we first need to dislodge the CD puck holder from the top, pull the tray out, then turn the unit back to up side down position. |
 |
| A close up of the full aluminium die cast CD tray. Very few CD players of today will use this very expensive way to make a CD tray. It's mostly made from plastics of varying quality. |
 |
| Next the cable loom running thru just beneath the CD transport needs to be unclipped for easy access & removal. Note the 4 springs on each corner of the KSS-190A CD transport! Just like the Philips CD Pro on my previous Marantz CD7! |
 |
| The springs do provide the CD transport some degree of suspension from external vibrations. |
 |
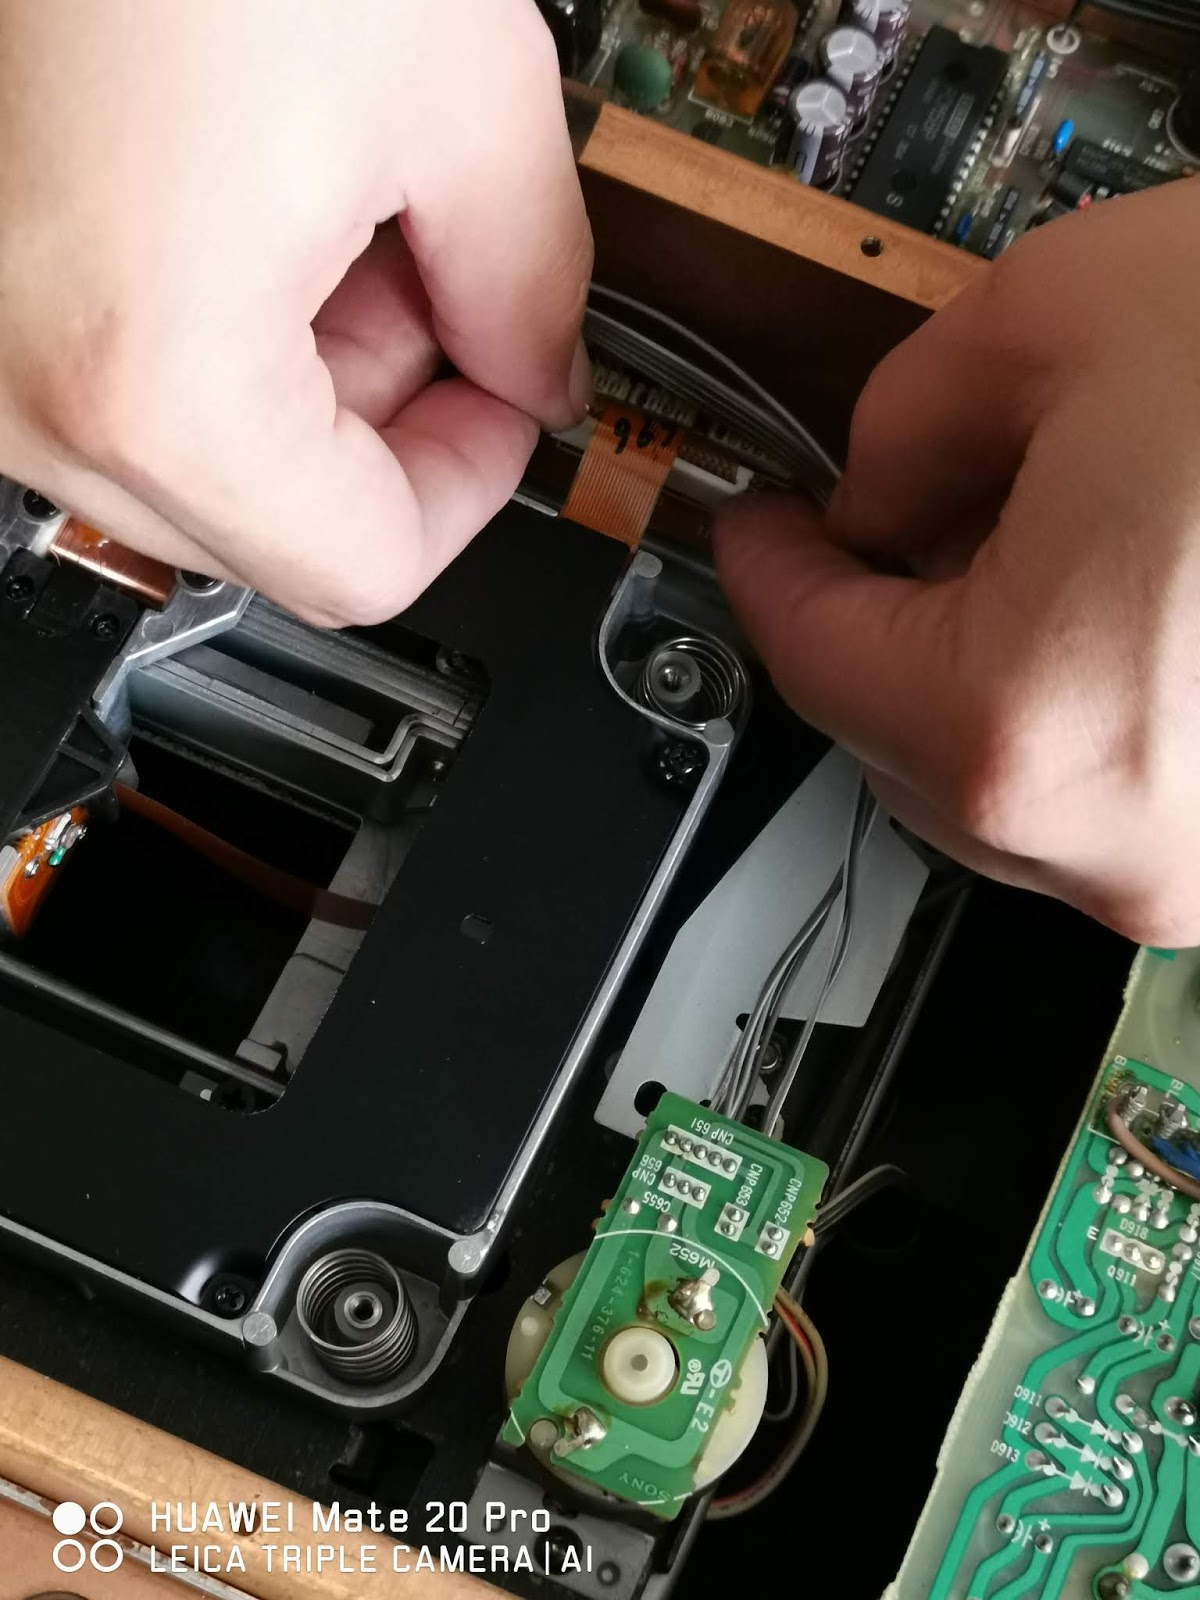
| Now we remove the main ribbon cable for signal, clipped with the white plastic finished locking cover. |
 |
| Due to age, the handling of this ribbon cable is delicate to say the least! |
 |
| With the original CD transport out from the Sony, can you spot the new vs the original? Neither could we! What, you think that I would be crazy enough to attend to something like this on my own??? Like I always do, I consulted Wong sifu! |
 |
| We couldn't spot the diference between the out going and incoming KSS-190A, until we found this little dot of solder which acts like a shorting plug for transport! The little solder dot needs to be removed before plugging in to the Sony. You'll need a heat controlled solder gun, and very steady hands for this job. Too much heat or too slow hand motion and the ribbon cable melts along with the solder lead! I left this step to capable hands of Wong sifu! |
 |
| With the ribbon cable prep step done, the replacement CD transport in re-inserted back to it's proper place, be mind full of the cable loom running just over the transport, carefully aligning the cables back in to the white plastic twist clip to hold it in place. |
 |
| Now it's done, that's how tidy things should be when doing cable management! While working on the CD transport, we also took the opportunity to replace the CD tray drive belts, by removing the little Mabuchi motor and cover assembly on the top right of the picture. Sony's attention to details is that they even cover all moving parts with a stamped steel cover, with the belt & transfer gear vaguely visible on the top right of the picture. |
 |
| Note the super thick sliding rails on which the BU-1D laser head assembly sits on! The degree of over engineering evident here is astounding! Also note the green coated spring on the bottom left of picture, the other 3 springs are just plain finished, not sure why, but some thing to keep in mind in order to replace in the same position after removal. Also note the transport locking screw just above the green coated spring! be sure to unlock the screw after installation, otherwise the transport won't work during testing, and we found out the hard way! |
 |
| Speaking of the CD tray belt change, the esteemed Mr Oh supplied me the necessary rubber belts. Bless the man & his treasure chest of audio spares! The small belt is the one you saw on the picture above. The bigger belt is buried much deeper inside the CD transport. |
 |
| Now that the CD transport replacement work almost complete, it's time to turn the Sony right side up and run some test. First, the CD tray in/out test, checked & super smooth! |
 |
| And now for the CD test, using my favorite CD, Pink Floyd's Dark Side Of The Moon! |
 |
| Great results, TOC detected, the CD plays well, skip & reverse tracks work fast and paused checked! |
 |
| With one final naked shot, see the twin XLR output trannies towards the back of the player? Sony never did balance audio signal on any CD player like this anymore! Just too expensive now days...... We proceed to close both the top and bottom covers and call it a day! |
 |
| Withe replacement a success, it's back to enjoying the music. It took almost 200 hours or so for the refurbished CD transport to run in and start to sound good somehow. May be I am experiencing psycho acoustics again??? |
With that I had successfully resurrected another flagship CD player from the dead, and living in today's throw away world, it felt really good to preserve a historic milestone of Sony in it's golden era. Sony today is never the same greatness in commitment to hifi quality again. I sent my dead KSS-190A CD mechanism back to my buddy for refurbishment, waited about 2 months, and finally my original KSS-190A unit came back as my back up transport. I plan to keep this Sony CDP-X7 ESD in service for as long as I could.
I love the sound quality of the Sony. It had a warmish tonal balance, compared to today's high resolution, strictly neutral tonal balance. I would say the Sony does not suffer in terms of resolution, but rather presents it without that fake glare, over detailed feeling of today's player. In contrast the Sony sounds soothing, with an tint of rose hued tonal balance, and what I love the most about it, that bad ass fat bass lines. This player can really rock and plays pop recordings really well....... so well in fact, that when compared to another player from the same golden era costing at least 3 times the price when new, the Sony gives away little in terms of sound quality. The more expensive equipment may sound different, but it's really not much better either! Yes, it's a Sony & it's as good as strolling down memory lane 1988 gets.


2 comments:
Dear friend!
I also need a kss-190a repair.
Could you contact the person who helped you?
lobachvolodymyr@gmail.com
Hi!
My contact is in China, and he has gone AWOL since the pandemic hit us last year!
Sorry, can't help you there
Post a Comment